







Executive Overview
In the high-stakes environment of modern post-production, efficiency is the ultimate currency. Video editors are constantly balancing the demands of tight deadlines against the need for pristine creative execution. While much attention is paid to visual effects, color grading, and narrative pacing, audio mixing remains one of the most time-consuming bottlenecks in the editing suite. Specifically, manual audio keyframing—the process of adjusting volume levels over time to accommodate dialogue, music, and sound effects—frequently devolves into a tedious, mouse-intensive chore.
For years, editors have relied on the standard mouse-and-pointer method to click, drag, and adjust individual keyframes on Adobe Premiere Pro’s timeline. However, this traditional approach is rife with inefficiencies: it introduces the risk of accidental clip adjustments, increases physical strain, and slows down the creative flow.
This investigative guide uncovers a paradigm-shifting methodology: a purely keyboard-driven audio keyframing workflow that allows editors to execute precise audio ducking and volume adjustments without ever clicking a keyframe or selecting a clip. By leveraging legacy under-the-hood features, strategic keyboard remapping, and track targeting dynamics, editors can transform their mixing process from a slow, manual task into a rapid, tactile performance.
Detailed Chronology: Step-by-Step Implementation of the No-Click Workflow
Transitioning to a mouse-free audio workflow requires a systematic reconfiguration of both the Premiere Pro timeline interface and the editor’s muscle memory. Below is the precise chronological progression required to master this advanced methodology.
[Phase 1: Workspace Prep] ──> [Phase 2: Bracket Control] ──> [Phase 3: Track Targeting] ──> [Phase 4: Keyframe Mapping] ──> [Phase 5: Keyboard Ducking]Phase I: Workspace Sanitization (Disabling Timeline Visual Clutter)
The first step in reclaiming control over the timeline is preventing accidental mouse interactions. When audio or video keyframe lines are visible on the timeline, a misplaced click can inadvertently alter volume levels or opacity settings, disrupting hours of meticulous mixing.
- Navigate to the timeline panel in Adobe Premiere Pro.
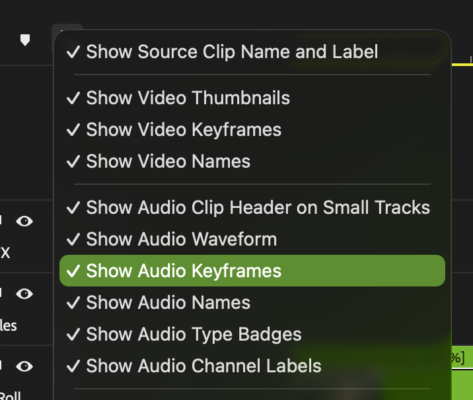
- Locate and click on the Timeline Display Settings (represented by the wrench icon).
- In the dropdown menu, locate Show Audio Keyframes and toggle it off. (Depending on your workflow, you may also choose to toggle Show Video Keyframes off).
- By hiding these interactive lines when they are not actively needed, you eliminate the risk of accidental volume shifts caused by dragging clips across the timeline.
Timeline Wrench Menu
 ├── Show Video Keyframes ──> Toggle OFF (Prevents accidental video opacity shifts)
 └── Show Audio Keyframes ──> Toggle OFF (Prevents accidental volume adjustments)
Phase II: Harnessing the Bracket Keys for Rapid Gain Adjustments
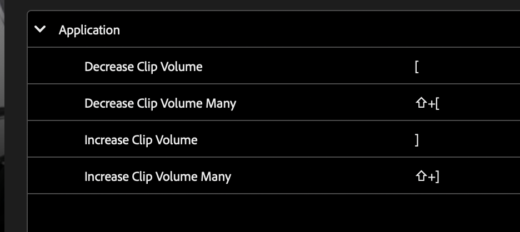
With the visual distractions removed, the editor can begin utilizing physical keyboard controls to adjust volume. The fundamental tools for this phase are the left and right bracket keys ([ and ]), positioned directly below the zoom controls (- and +).
- Single Clip Adjustments: Select any audio clip on the timeline. Pressing the right bracket key
]increases the clip volume by 1 dB. Pressing the left bracket key[decreases the volume by 1 dB. - Coarse Adjustments: Holding the
Shiftkey while pressing the brackets increases or decreases the volume in larger steps (typically 6 dB increments, depending on user preferences), allowing for rapid level-setting. - Batch Processing: If multiple clips are selected via lasso or multi-select, pressing the bracket keys adjusts the volume of all selected clips simultaneously, ensuring relative volume consistency across entire sequences.
Phase III: Decoupling from the Mouse via Track Targeting
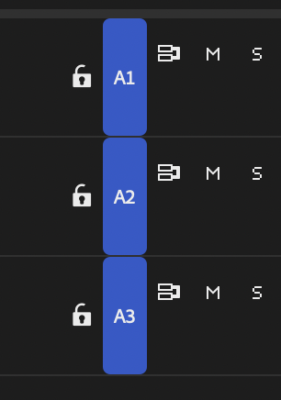
To adjust audio volume without clicking a clip, the editor must leverage Premiere Pro’s track targeting system. This system acts as a virtual selector, telling the software exactly where to apply keyboard commands based on the playhead’s position.
- The Default Behavior: If no clips are selected on the timeline, pressing the bracket keys (
[or]) will adjust the volume of every single audio clip on every active track currently sitting directly beneath the playhead. - Isolating a Single Track: To restrict adjustments to a specific track (such as a music track or a dedicated dialogue track), the editor must isolate that track.
- The Shortcut: Press
Shiftand click on any track target header to instantly deselect all tracks. Then, click solely on the target header of the desired track (e.g., Audio 2). - The Result: Now, when the playhead sits over a complex edit, pressing the bracket keys will only adjust the clip on the targeted track, bypassing all other overlapping audio elements.
Track Targeting Workflow:
[Shift + Click Track Header] ──> Deselects All Audio Tracks
[Click Target Track (e.g., A2)] ──> Isolates Target Track
[Playhead Placement] ──> Brackets [ / ] Now Only Affect Isolated Track
Phase IV: Mapping the Missing Link ("Add or Remove Audio Keyframes")
The true magic of this workflow lies in the ability to generate keyframes on the fly without using the Pen tool (P) or Command-clicking lines. This requires mapping a specific, underutilized command in Premiere Pro’s keyboard shortcut database.
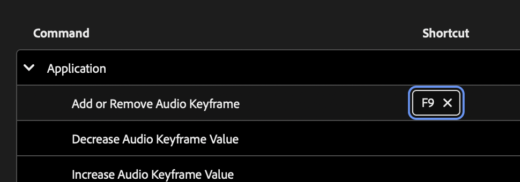
- Open the Keyboard Shortcuts menu (
Option + Command + Kon macOS;Ctrl + Alt + Kon Windows). - In the search bar, type: "Add or Remove Audio Keyframes".
- Map this command to an easily accessible key. (A highly recommended mapping is
F9, as it sits in close proximity to the bracket keys, enabling seamless one-handed execution). - Click OK to save the new keyboard layout.
Phase V: Executing the Flawless Keyboard-Only Ducking Routine
With the shortcut mapped and track targeting active, the editor can execute professional-grade audio ducking—lowering background music during a voiceover—entirely via keyboard, even during active timeline playback.
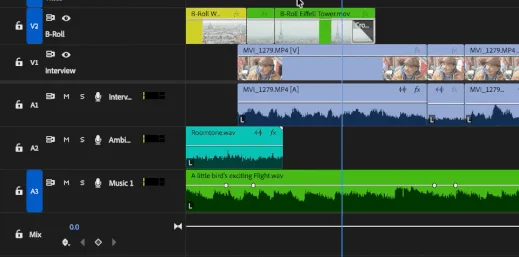
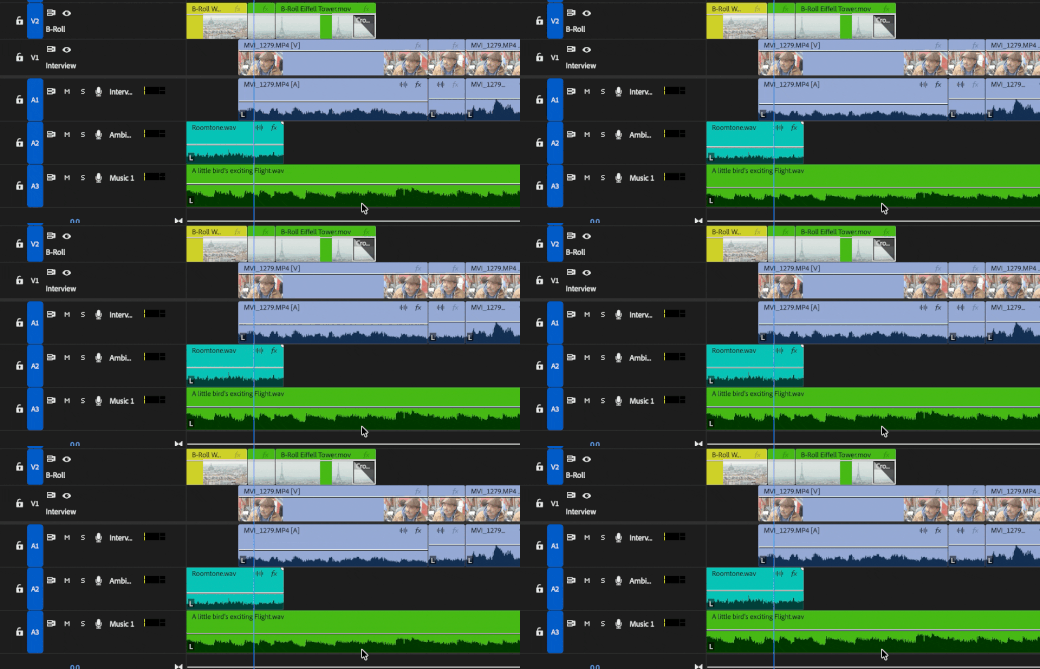
- Target the music track (e.g., Audio 3) and deselect all other tracks.
- Play the timeline. When a voiceover segment begins, tap
F9twice in rapid succession to place two initial keyframes (marking the start of the transition). - Continue playback to the end of the voiceover segment and tap
F9twice again (marking the end of the transition). You now have four keyframes on the clip. - Position the playhead anywhere between the second and third keyframes.
- Press the left bracket key
[to lower the entire middle segment. - The Outcome: Premiere Pro automatically lowers the volume of the segment between the inner keyframes, creating smooth, symmetrical ramps on either side—all without a single mouse click.
Supporting Context & Metrics: The Cost of Mouse-Heavy Editing
The shift toward keyboard-only editing is not merely a matter of preference; it is supported by ergonomic science and workflow efficiency metrics.
The Ergonomics of Post-Production
Repetitive Strain Injury (RSI) and Carpal Tunnel Syndrome are occupational hazards for professional editors. These conditions are heavily exacerbated by micro-movements associated with precision mousing—such as hovering over a thin audio line to click a 2-pixel-wide keyframe.
By transitioning these repetitive actions to larger muscle groups in the hand and fingers via keyboard shortcuts, editors significantly reduce tension in the wrist and forearm.
Quantifying the Efficiency Gains
To demonstrate the practical value of this workflow, consider a comparative analysis of a standard 10-minute promotional video featuring a voiceover and a background music track. This edit requires approximately 30 "ducking" adjustments to accommodate dialogue pauses.
| Metric / Step | Traditional Mouse Method | Keyboard-Driven Method (F9 + Brackets) |
|---|---|---|
| Tool Selection | Switch to Pen Tool (P) |
None (Hands remain on keyboard home row) |
| Targeting Precision | Hover and click exactly on the keyframe line | Instantaneous (Relying on track targeting) |
| Keyframe Creation | 4 precise Ctrl-clicks | 4 rapid taps of F9 |
| Adjustment Execution | Click and drag line down (prone to horizontal drifting) | Tap [ key (constrained strictly to vertical dB scale) |
| Average Time Per Duck | ~15 seconds | ~3 seconds |
| Total Time (30 Ducks) | 7.5 minutes | 1.5 minutes |
| Error Rate (Accidental Moves) | Moderate (slipping off the line) | Near Zero |
By saving six minutes per short sequence, an editor working on long-form content, episodic television, or daily social media deliverables can reclaim hours of productive time every week. Furthermore, because keyboard adjustments are constrained to exact integer steps (1 dB or 6 dB), they eliminate the micro-adjustments and "nudging" that often plague mouse-based editing.
Official Statements: Community Insights and Developer Intent
This keyboard-driven approach highlights a fascinating aspect of software development: the longevity of deep-level, legacy features. Many of these keyboard commands have existed within Adobe Premiere Pro’s architecture for over a decade, yet they remain largely undiscovered by the broader user base.
Industry experts and Adobe Certified Instructors frequently emphasize that the software is designed to be operated primarily via keyboard. In past community forums and official Adobe "Tool Tip Tuesday" presentations, developers have noted that the keyboard shortcut layout was engineered to allow high-speed editors to bypass GUI limitations entirely.
"The most powerful features in Premiere Pro are often the ones you cannot see," remarks a veteran post-production workflow specialist. "When Adobe implemented track targeting and bracket volume adjustments, they created a system designed for speed-demons. The tragedy is that so many editors still edit as if they are paint-brushing with a mouse, rather than playing an instrument."
This sentiment is echoed by the growing popularity of external hardware integration. Power users frequently map these exact keyboard shortcuts ([ , ] , and Add/Remove Keyframes) to external macro controllers such as the Elgato Stream Deck, Loupedeck, or custom editing consoles. This physical integration further bridges the gap between software capability and tactile, muscle-memory execution.
Future Outlook: The Intersection of Manual Control and AI
As post-production enters the era of artificial intelligence, workflows are shifting rapidly. Adobe has introduced automated tools like Auto-Ducking within the Essential Sound panel, which uses Adobe Sensei AI to automatically analyze dialogue and lower music tracks accordingly.
                  ┌──────────────────────────────┐
                  │   AI-Powered Auto-Ducking    │
                  │  (Speedy, Macro Adjustments)  │
                  └──────────────┬───────────────┘
                                 │
                                 ▼
                  ┌──────────────────────────────┐
                  │ Keyboard-Driven Fine-Tuning  │
                  │  (Precision dB Adjustments)  │
                  └──────────────┬───────────────┘
                                 │
                                 ▼
                  ┌──────────────────────────────┐
                  │    Flawless, Custom Mix      │
                  └──────────────────────────────┘
While these AI tools are highly effective for rough cuts and standard corporate edits, they often lack the nuance required for high-end cinematic storytelling, comedic timing, or complex sound design. Professional mixers frequently find themselves overriding AI decisions to preserve artistic intent.
The future of professional editing does not lie in choosing between AI automation and slow manual labor. Instead, it lies in hybrid workflows. An editor might use AI to generate a baseline mix, then employ the F9 + Bracket key workflow to rapidly fine-tune transitions, adjust emphasis, and sculpt the soundscape with surgical precision.
By mastering these hidden keyboard mechanics, editors ensure they remain indispensable in a changing industry—retaining absolute creative control over their audio mixes while working at a speed that automation alone cannot match.