The democratization of high-end visual effects tools has fundamentally shifted the landscape of digital video editing. Where once complex rotoscoping, green-screen extraction, and multi-layer compositing were reserved for specialized post-production houses, modern non-linear editors (NLEs)—specifically Adobe Premiere Pro—now feature sophisticated automated tools like AI-driven object masking. Editors can isolate subjects and transplant them into entirely new environments with a single click.
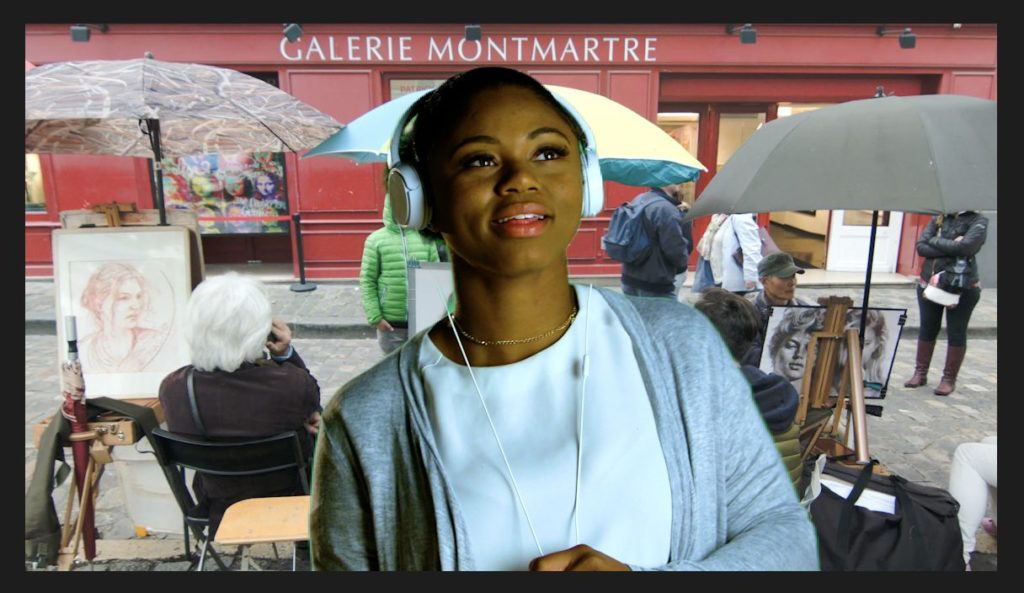
However, this technological leap has highlighted a critical, systemic issue in modern digital content creation: while the extraction of a subject has become nearly flawless, the integration of that subject into a new background frequently fails to convince the human eye.
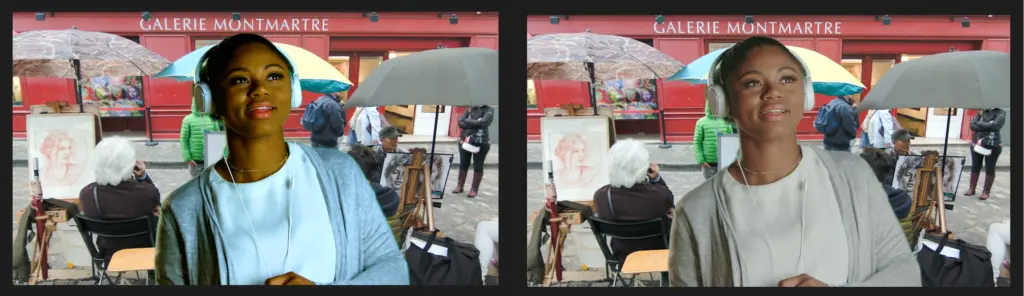
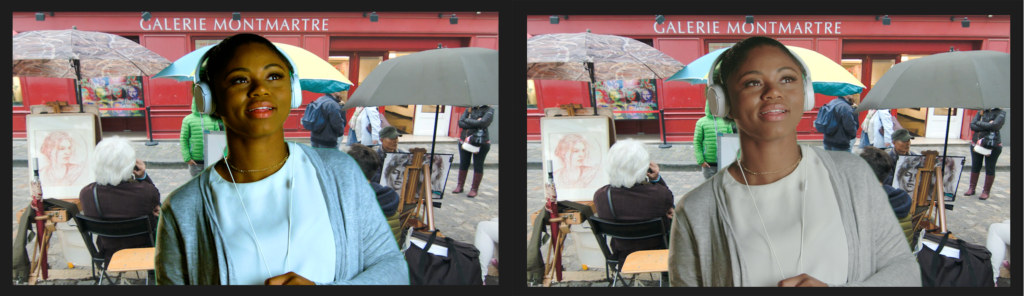
The primary cause of this visual disconnect is not the quality of the edge extraction, but rather a fundamental mismatch in lighting physics—specifically, discrepancies in luminance (Luma) and color (Chroma) between the foreground and background elements. When a high-contrast subject shot in a controlled studio is placed against a low-contrast or atmospheric background, the viewer’s brain instantly detects the artificiality of the scene. This investigation explores the technical mechanics of Luma and Chroma alignment, detailing a precise, professional workflow to achieve optical cohesion in digital composites.
Detailed Chronology of the Compositing Workflow
To understand how a composite fails—and how to correct it—one must examine the chronological lifecycle of a visual effects shot during the editing and color grading phases. The process of integrating a masked subject into a plate involves a highly structured series of diagnostic and corrective steps.
[Phase 1: Subject Extraction]
       │ (Chroma Keying / AI Object Masking)
       ▼
[Phase 2: Diagnostic Analysis]
       │ (Isolate Elements & Consult Lumetri Waveform)
       ▼
[Phase 3: Luma Alignment]
       │ (Adjust Black Point -> White Point -> Gamma)
       ▼
[Phase 4: Chroma Calibration]
       │ (Match Mid-tone Color Cast & Saturation)
       ▼
[Phase 5: Optical Integration]
       │ (Apply Light Wrap / Edge Softening)
       ▼
[Final Cohesive Composite]
Phase 1: Subject Extraction and Isolation
The workflow begins with isolating the foreground subject. Whether utilizing traditional green-screen chroma keying (such as Premiere Pro’s Ultra Keyer) or modern, AI-powered Object Selection and Masking tools, the editor separates the subject from their original environment. At this initial stage, the subject is placed over the target background plate.
Phase 2: Diagnostic Analysis via Lumetri Scopes
Once the subject is positioned over the background, the visual mismatch becomes apparent. To diagnose the exact nature of the discrepancy, the editor must look beyond subjective human vision, which is highly adaptable and easily deceived, and consult objective telemetry.
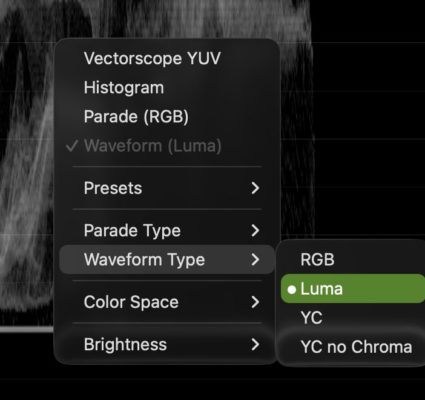
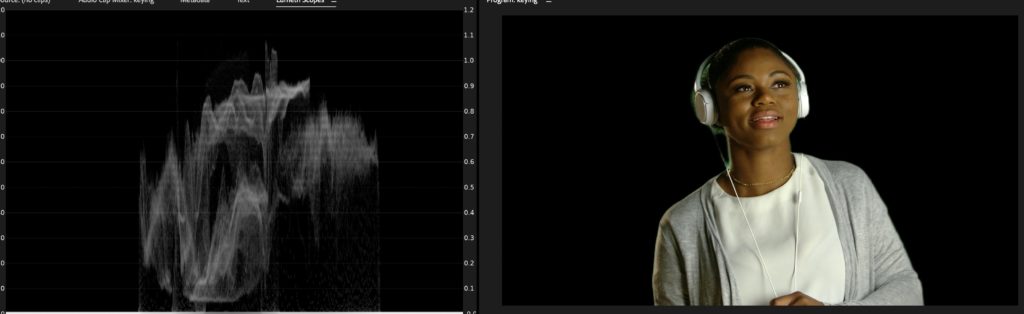
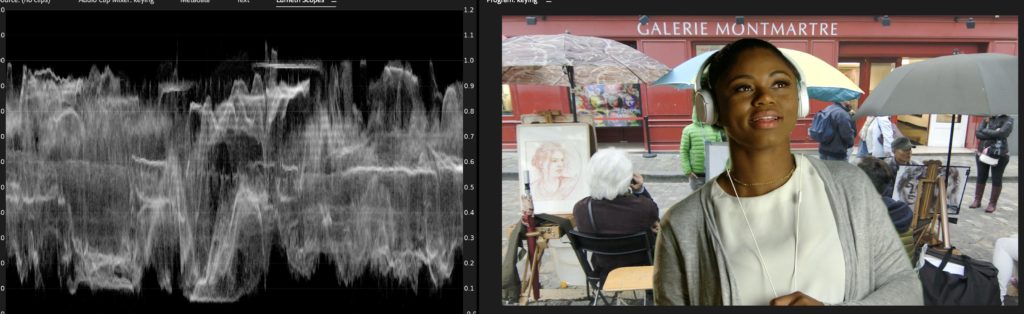
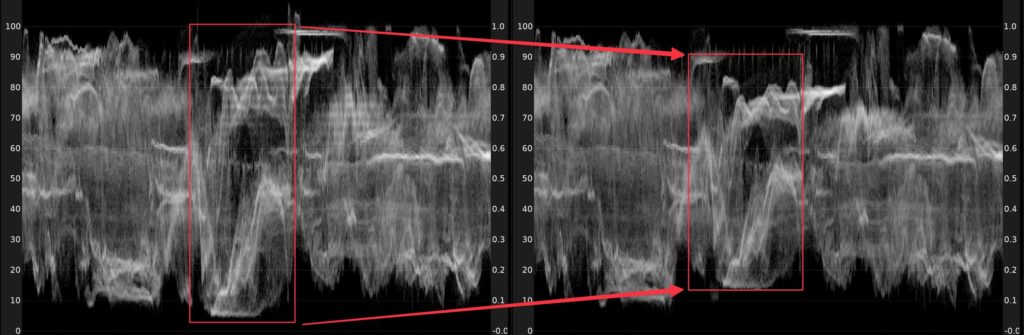
The editor opens the Lumetri Scopes panel and isolates the Luma Waveform. By toggling the background track on and off in the timeline, the editor can observe how the waveform profile changes. This diagnostic step reveals the exact mathematical differences in brightness levels between the two layers.
Phase 3: Executing the Three-Point Luma Alignment
With the telemetry active, the editor initiates color correction. Crucially, this corrective work must be applied after the keying or masking effect in the render pipeline. If corrections are applied before the keyer, the shift in color and contrast values will degrade the keyer’s ability to cleanly separate the green screen or edge boundaries.
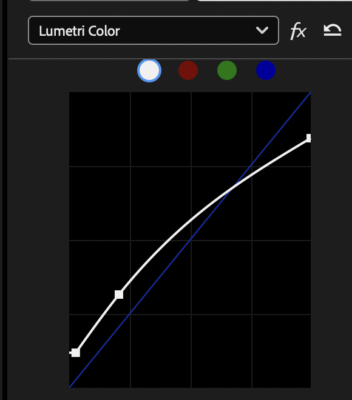
Using the Lumetri Color Curves or Three-Way Color Wheels, the editor systematically matches three critical points of the foreground subject to the background:
The Black Point (Shadows): The editor identifies the darkest area of the background plate and adjusts the black level of the foreground subject until it matches. If the background’s darkest shadow is a lifted gray (common in misty, overexposed, or outdoor scenes), the foreground’s shadows must be lifted to match.
The White Point (Highlights): The editor locates the brightest light source or highlight in the background and adjusts the foreground’s white point. If the background is a dim, overcast afternoon, the foreground’s highlights cannot exceed the maximum brightness of that environment.
The Gamma (Mid-tones/Exposure): Once the boundaries of the dynamic range (blacks and whites) are locked, the editor adjusts the mid-tones (Gamma) to match the overall ambient exposure of the scene. This step corrects the perceived contrast and weight of the subject.
Phase 4: Chroma Calibration and Saturation Matching
With the luminance values mathematically aligned, any remaining discrepancies are color-based. The editor evaluates the ambient color cast of the background (e.g., the warm orange of a sunset or the cool blue of twilight) and introduces a corresponding tint to the foreground’s mid-tones. Finally, the overall saturation is adjusted to ensure the subject does not look unnaturally vibrant or lifeless compared to their surroundings.
Supporting Context & Technical Metrics
Achieving a realistic composite requires an understanding of how digital video displays information and how the human visual system processes contrast and color.
Understanding the Luma Waveform Monitor
The Luma Waveform monitor is a graphical representation of the luminance distribution across the video frame.
The Horizontal Axis (X-axis): Corresponds directly to the physical space of the video frame from left to right.
The Vertical Axis (Y-axis): Represents brightness, measured either in IRE (Institute of Radio Engineers) units ranging from -20 to 120, or in digital 8-bit/10-bit values (0 to 1023).
When analyzing a composite, if the background waveform shows a shadow floor of 10 IRE, but the foreground subject’s hair or clothing plunges to 0 IRE, the subject will appear "pasted on." The deep black of the subject breaks the atmospheric perspective of the background, immediately exposing the composite as artificial.
The Physics of Human Visual Perception
Human perception is highly sensitive to relative contrast. According to Weber’s Law, our ability to detect differences in intensity is proportional to the background intensity. In a composited image, if the foreground subject exhibits a high-contrast ratio (deep shadows and bright highlights) while the background is flat and diffused, the brain registers an irreconcilable physical contradiction.
Light behaves consistently in the physical world:
Atmospheric Haze: Dust, moisture, and air scatter light over distance. Objects further away (the background) naturally lose contrast, lifting their black points and lowering their white points.
Ambient Bounce: A subject placed in a room with green walls will naturally receive green light bouncing onto their skin and clothing. If the composite does not reflect this ambient bounce, the illusion fails.
Official Statements & Industry Perspectives
Professional colorists and visual effects artists emphasize that matching technical metrics is essential to the craft.
In a technical feature published in partnership with Adobe’s Tool Tip Tuesday series on ProVideo Coalition, post-production experts stressed that compositing is fundamentally an exercise in color science rather than cutting paths.
"Between green screen, chroma keying, and the new object masking, I’m in love with how fast I can take a subject and put them into a new shot. What I don’t see much attention paid to is why so many of those composites don’t look good. It’s a color issue. It’s all about Luma and Chroma."
The industry consensus points to a common error among novice editors: focusing solely on edge precision while ignoring environmental integration. Professional colorists note that even a poorly masked subject with slightly soft edges can look convincing if the Luma and Chroma values are perfectly matched to the background. Conversely, a mathematically perfect vector mask will look artificial if the foreground subject has high-contrast studio lighting while the background is a low-contrast exterior.
Furthermore, industry experts point out a technical limitation within native NLEs regarding Light Wrapping. Light wrapping is an optical phenomenon where intense light from behind a subject bleeds over their edges due to lens diffraction and atmospheric scattering.
While Premiere Pro provides robust tools for Luma and Chroma adjustment, creating an organic light wrap often requires moving the assets into Adobe After Effects or utilizing specialized third-party plugins.
Future Outlook: AI Integration and Spatial Compositing
As non-linear editors continue to evolve, the integration of artificial intelligence is expected to move beyond simple masking and address the physical properties of light.
Automated Spatial Relighting
The next frontier in digital compositing is AI-driven spatial relighting. Current AI models are being trained to analyze the lighting direction, color temperature, and contrast ratio of a background plate and automatically apply corresponding volumetric lighting changes to a 2D foreground subject. This technology will eliminate the need for manual curve adjustments by automatically mapping the Luma and Chroma profile of the background onto the isolated subject.
Real-Time Light Wrap Generation
Future updates to native editing suites are expected to include automated, physically accurate light wrapping tools. By analyzing the luminance values of the background pixels directly adjacent to the mask boundaries, future NLE engines will be able to generate dynamic edge diffraction in real time, bridging the gap between Premiere Pro’s editing workflow and After Effects’ advanced compositing capabilities.
Conclusion
Ultimately, while automated tools and artificial intelligence continue to accelerate the technical steps of video editing, the fundamental principles of art and physics remain unchanged. Achieving realism in visual effects requires a disciplined approach to matching light, contrast, and color. By mastering the diagnostic power of Lumetri Scopes and implementing a structured Luma-first, Chroma-second workflow, editors can ensure their composites are visually cohesive and convincing to the human eye.